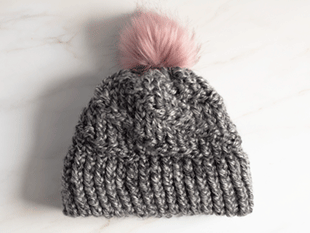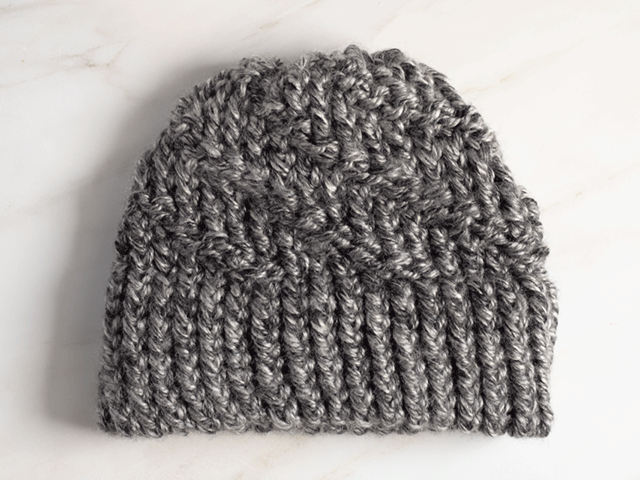


I know I’m just starting my loom knitting journey, but I’m excited at all the possibilities a ball of yarn presents. Recently, I made a Fair Isle hat to sell on Etsy. Not long after, I grabbed two different colors of yarn and paired them to make a two-tone beanie for my husband because my largest loom had a much larger gauge than the others. This week, I made a swirl beanie for my daughter, complete with a fluffy pink Pom-pom.
I’ve seen a lot of swirl patterns available for purchase online, but being the tight-budgeted mama that I am, I decided to make my own pattern. I love sharing the things I learn with my readers, so now you can have my pattern for free – if you’re interested. Just follow the steps below, and soon you’ll have your own loom-knit swirl beanie.
This Loom-Knit Swirl Beanie doesn’t need a lot of materials to make – just a loom, some yarn, a knitting hook, yarn needle, and scissors. If you’re feeling particularly creative, you could add a Pom-pom, a button, or maybe a leather tag that lets others know you’re crafty.
My loom-knit swirl beanie is so simple and straightforward that even beginning knitters should have no problem following the pattern. The concept is adaptable to almost any loom.
However, if you struggle as much as I do with following a pattern, I find it’s easiest to make the beanie when you have the exact tools used in the instructions. My loom is a 9-inch loom with 36 pegs. It’s a 5/8th inch gauge loom ideal for working with bulky size 5 or size 6 yarn.
As an Amazon associate, I’ve provided affiliate links to the products I’m using in my tutorial. I do earn a small commission for purchases from these links, but I’m not paid to recommend specific items or brands. I only write about things I love, and I never want you to feel obligated to buy what I link to. Feel free to use whatever loom you have on hand.
The yarn you use ultimately affects the look of your loom-knit swirl beanie. A thinner yarn on a bigger gauge loom will look lacy and delicate, but it might not keep you warm.
If you have a loom similar to mine, I recommend a thicker bulkier size 6 yarn. In this tutorial, I specifically use Lion Brand Hometown Bulky size 6 yarn. It’s readily available at Walmart, Target, Amazon, and hobby stores.
I only purchased one skein for the hat above, and I ended up running out of yarn prematurely. Fortunately, the smaller hat size fit my daughter’s head perfectly. But if you’re making this hat for an adult, you may want to buy two skeins of the same color to ensure you have enough to finish the job, and maybe have a little bit leftover to make a Pom-pom.
If you have a tighter gauge loom, you may wish to pick a smaller yarn size so you don’t have to wrestle your yarn over the pegs.
This loom-knit swirl beanie looks eye catching on its own. However, I feel like hats need some kind of decoration to set them apart. My daughter is a fan of pink, so a fluffy pink Pom-pom was appropriate.
In contrast, you may want to make your own Pom-pom with the leftover yarn. Or perhaps you may want to add a large eye-catching button or faux leather tag to give your hat a signature look.
This is ultimately your hat – so you get to decide what looks good to you! Just be sure to have them all on hand by the time you finish knitting.
This loom knit swirl beanie utilizes two basic stitches: the e-wrap and the purl. The majority of your beanie will use the e-wrap as its base, and then the purl stitches will make the swirl.
To begin your beanie, tie a slip knot around the starting peg of your loom. Many looms have a marker of some kind – my particular loom has an extra peg. From there, wrap the yarn around the neighboring peg so the loop rests on the outside and the strand rests on the inside of the loom. It doesn’t matter whether you go to the left or to the right, so long as you’re consistent. I tend to go to the left, so that’s what you’ll see in the tutorial.
Continue to wrap each peg until you’ve gone all the way around your loom. Then, do it again all the way around the loom. When you’ve finished, take your working yarn and wrap it around your starting peg (if you have one) to hold it in place. If you don’t have a starting peg, you can simply hold the yarn off to the side or wrap it around the last peg a few times, so long as it’s secure for a few minutes.
Grab your knitting hook and slide it into the bottom loop of your first peg.
Pull the loop up and over the peg, but do it gently or your original slip knot may come undone.
Go around the entire loom, lifting each bottom loop over the top loop. Congratulations! You’ve just knitted your first row of your loom knit swirl beanie.
Technically, you could approach your hat’s brim in a variety of different ways. Some people prefer to alternate between e-wrap and purl stitches to create a ribbed brim. Others prefer to make their hat extra long and then use a button to keep the brim folded up.
I personally prefer a nice thick folded brim that’s knitted into the rest of the hat rather than held with a button. The folded brim keeps the hat from twisting and turning over time, and it gives the hat a nice bell shape.
To make a folded brim, e-wrap about 15 to 20 rows. The more rows you knit, the thicker your brim will be. I find 20 rows to be my personal sweet spot, so that’s what you’ll see pictured below.
Next, reach inside your loom and grab the loop next to your original slip knot. Pull that loop up and over the starting peg. Then, grab the neighboring loop, and pull it up and over the neighboring peg. Repeat until you’ve gone all the way around your loom. Make sure your working yarn is still in the right position (I’ve had to undo quite a bit of work because I left my yarn on the wrong side of a peg).
From here, you’ll apply the same technique you used to knit your e-wrap stitches. Just insert your hook in the bottom loop.
And pull it up over the top loop.
When you’ve gone around the entire loom, you’ve finished your brim.
The purl stitch is the opposite of the e-wrap. In fact, if you were to make a beanie entirely out of e-wrap stitches, and then turn that beanie inside out, you’d see all purl stitches on the inside. So how exactly do you flip the stitch?
Start by pulling your working yarn in front of the peg and beneath (not above!) the previous loop.
Insert your hook through the top loop and grab the working yarn.
Pull the working yarn partway through the loop to create a new loop.
Lift the old loop up and over the peg. Place the new loop over the peg. Gently pull on the working yarn to tighten it.
Although it has an extra step or two compared to the e-wrap, once you’ve mastered the purl stitch, you should have no problem making this loom knit swirl beanie.
Now that you’ve got your brim finished and your two stitches mastered, it’s time to put the rest of the hat together. All you need to do is knit four stitches, and then purl two stitches. That’s easy enough to remember, right?
Well, maybe not as easy as you might think. If you consistently knit four and purl two, you’ll end up with a rather fetching ribbed knit pattern. To create that swirl effect, you need to move that pattern over a peg with each row you knit.
As a visual guide, I made this graph. The numbers going across the top are the individual pegs on your loom. The numbers going across. The side are the rows you knit. I made this graph specifically for my 36 peg loom and I prefer to knit about 20 rows for an adult sized hat (though the pictured hat only made it to row 15 before I started to run out of yarn). Note that this graph doesn’t include the folded brim we just made.
If you prefer a text pattern over my grid, here’s a breakdown of how to make my loom knit swirl beanie.
When you hit row 13, you pretty much repeat the pattern all over again with row 1 in the same way you repeated the pattern on row 7. Just keep going until you hit row 20, or until you make your hat as long (or short) as you wish.
I hope my pattern doesn’t confuse you too much. If you followed it correctly, the purl stitches will pop out against the knitted stitches, creating that swirl pattern.
When you’ve finished knitting and purling all your rows, you can remove your loom knit swirl beanie with just a few simple steps.
First, wrap your working yarn all the way around your loom one and a half times. Cut it. Thread your yarn through the yarn needle, and then insert it through the bottom of the loop on your starting peg.
Next, pull the yarn through the loop until your loop slides up and off the peg. Repeat with the second loop, coming up through the bottom once more. Continue around the entire loom.
Now that your loom knit swirl beanie has come off the loom, it’s time to tidy up. Knot and tuck any loose ends from your yarn.
When you’re ready, pull on your working yarn to cinch the hat closed. Don’t feel the need to pull your hat too tight.
Instead, use your excess yarn to stitch the hole in the top.
After stitching the hole, tie a finishing knot. Cut any yarn you don’t need, and then tuck the loose ends in. Flip your hat inside out, and you’re done!
At this point, I like to add a Pom-Pom, a button, a “handmade with love” tag, or a mix of all three. If you need instructions for how to make a Pom-Pom by hand, check out my Fair-Isle Beanie tutorial for step-by-step pictures.
Otherwise, you can skip the Pom-Pom altogether or use a premade Pom-Pom like this one from Amazon.
I had a lot of fun making my loom knit swirl beanie, and I hope you do, too. I made a few mistakes along the way, but maybe you can avoid them by following my tutorial rather than guessing as you go.
Are you more crafty and experienced with loom knitting than I am? Feel free to give pointers and tips in the comment section below. I’m still learning and I appreciate all your feedback. Other beginning knitters can benefit from your help, too.
I can’t believe I missed the entire month of January before I managed to share…
My goodness the time has flown! My teeny tiny baby is not so small anymore.…
I’m back with another bread recipe! This week’s sweet bread is sourdough discard peanut butter…
Well, it’s been a while since I’ve shared my latest preschool printables. I originally thought…
I tried making Challah for my bread blog this week. I learned a lot about…
I’m back from my mental health break and here to wish all the moms, sisters,…