
I love collecting new hobbies. From carving to painting to everything in between, I pick up crafts to keep my mind and hands busy. Last year’s hobby took me by surprise: I fell head over heels for loom knitting. Now I’m ready to share what I learned with you this year.
One of the first projects I learned to loom knit was a beanie. Although I had some bare-bones guides from a few different sources to teach me the basics, trial and error turned out to be the best teachers. Once I had the essentials down, I experimented until I could create a basic pattern that made me happy.
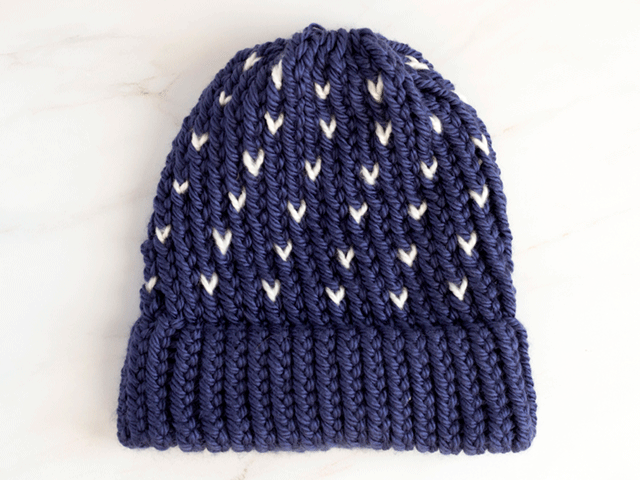
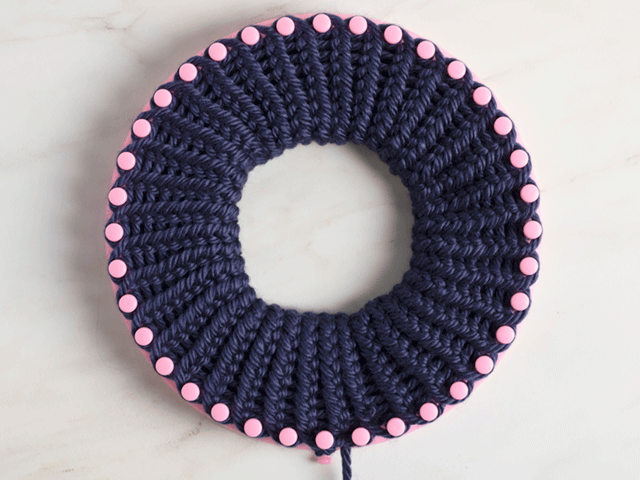
All my hard work and exploration culminated in an adorable tiny hearts beanie. I made two matching hats for my parents, and now you can make them, too.
Let’s Talk About Your Loom
I purchased a set of looms from Amazon* for about $20 (possibly less if I snagged it on sale or used points on my order). The looms came in varying sizes so I could make a bigger or smaller hat depending on whom the hat was intended for. I use the largest loom for my husband, and I use the next largest loom for me. My daughter fits the second smallest loom, and the smallest loom works well for my baby.
These looms have a varying number of pegs, and they are wide-spaced. The larger gaps between pegs make them the perfect choice for using thick, cozy yarns. And I like that the bigger spaces are more accommodating for clumsy fingers.
However, you don’t have to use these exact looms. The step-by-step instructions I provide for my tiny hearts beanie should be generic enough that you could use almost any round loom and see similar results. Feel free to shop around at your local craft or thrift stores and see what you find.
If you do choose to purchase from the above affiliate link, thank you. I receive a small commission on qualified purchases, which help keep my site running. I do not receive payment for opinions, though, and I only recommend items I personally use and enjoy.
Don’t Forget Your Materials
Yarn comes in a variety of lengths, widths, and textures. Generally speaking, crafters categorize yarn on a scale of 0 to 7, with 0 being thin and lacy and 7 being thin and jumbo.

To make things easy for this tiny hearts beanie project, I recommend using a size 5 or size 6 yarn, as juggling multiple strands of smaller yarn on a bigger loom can be difficult for beginning knitters. Smaller yarns result in a looser knit and a floppier hat, and I prefer a thicker beanie that will keep me warm in cold weather.
I purchased Lion Brand Yarn Hometown USA Yarn as the main color for this particular project because it was cheap, soft, and readily available at Wal-Mart. The yarn is a bulky size 5, and I only needed one skein.
Since we’re making a heart pattern today, you’ll need two different colored skeins. The second yarn in the photo is Yarn Bee tender touch that I picked up from a craft store. As much as I liked the color and texture for this yarn, it was a bit too thin compared to my main skein. Next time, I think I’ll stick to the Lion Brand for both colors.
Keep in mind that you can use yarn you have on hand or buy a similar yarn from a hobby or craft store. Note that your loom size and peg spacing may vary from mine. If your loom has more pegs spaced close together, you can use a thinner yarn and still achieve a nice knit.
How to Start
Many looms have a marker of some kind to help you keep track of where you start your project. My loom has a small round peg on the side, though similar looms have an engraved arrow or a different colored peg. If your loom doesn’t have any kind of designated starting peg, feel free to pick any spot on your loom to begin.
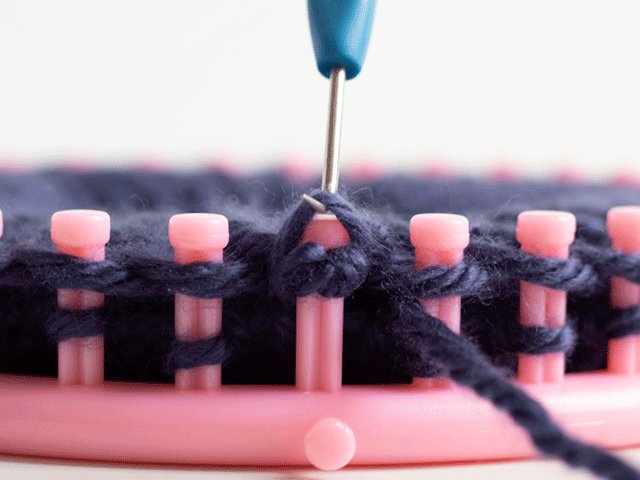
To start your tiny hearts beanie, tie a slip knot around the beginning peg. It’s okay to have a little extra yarn on the side – you’ll tuck this bit in later.
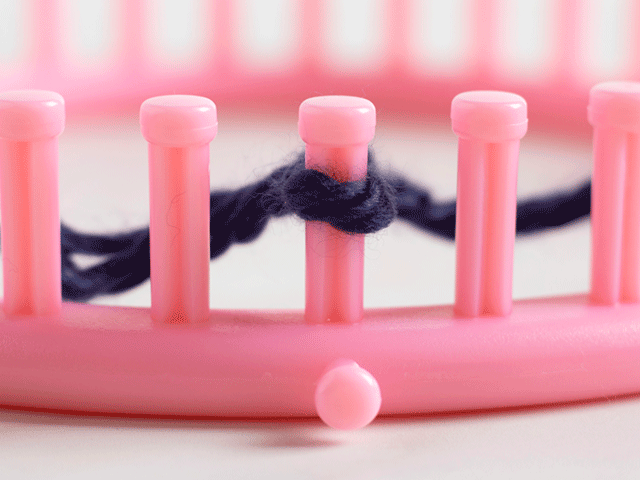
Next, wrap your string around the peg adjacent to your starting peg. It doesn’t matter if you go to your right or to your left, so long as you remain consistent. I prefer to go to my left, so the photos will reflect that choice.
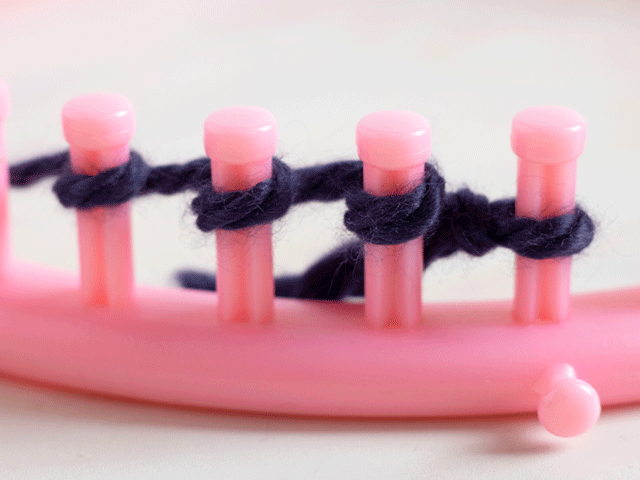
This wrap is call a basic e-wrap cast on because it more or less looks like the lowercase letter e. You want to repeat your e-wrap on each peg all the way around your loom until you’ve worked your way back to the beginning.
Pay attention to the tension of your yarn. You want it tight enough that it stays put on the peg, but not so tight that you can’t slide it up and over the peg later.
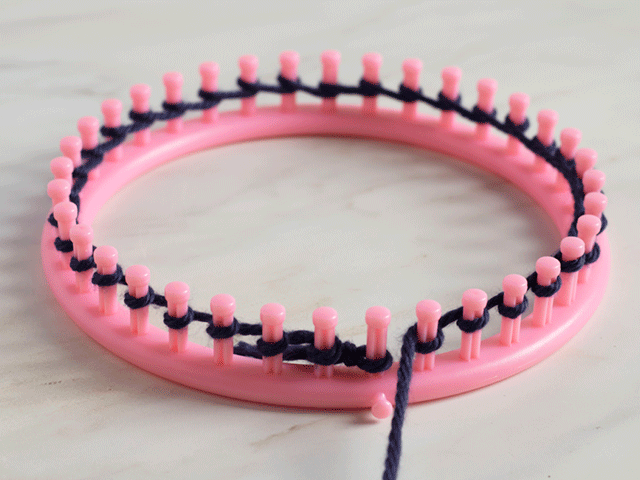
Not too bad right?
Knit Two Rows and Grab Your Hook
Now you just repeat your e-wrap again, wrapping around each peg until you make your way back to the beginning. You’ll have two rows when you’re done.
Now it’s time for the actual knitting part of your tiny hearts beanie. To keep the picture visually easy to read, I pulled my working yarn toward me. However, you may want to consider wrapping your yarn around the starting peg a few times just to hold it in place while you proceed to the next step.
Grab your knitting hook and insert it into the loop of the slip knot on your first peg. Be gentle, or your slip knot might come undone.
Gently pull the bottom loop up and over the top loop and let it fall behind the peg. Repeat this step until you’ve gone around the entire loom.
Congratulations! You’ve just knitted the first row of your tiny hearts beanie. You now have the basics down for loom knitting a variety of projects.
All you have to do now is to e-wrap another row, followed by hooking those bottom loops and pulling them up and over. If your loops slide too high to the top, feel free to push them down a little to make room for your next row.
Make the Brim
As you e-wrap around your loom, keep track of the number of rows you make. We’ll be working on the brim for the tiny hearts beanie first. Folded brims can be as thin or thick as you like, and you’ll need to adjust the number of rows you create depending on your personal preference.
I prefer a thicker brim, so I use anywhere from 15 to 20 rows depending on who I have in mind when I’m making the hat. For this example hat, I think I went the full 20 rows, or at least 18.
Once you have enough rows, reach inside your loom and grab the bottom of hat. Take a close look at the edges, and you’ll see a lot of small loops. Find your starting peg, trace your finger down your stitches until you find that initial slip knot.
Gently grab the loop to the left of the slip knot and pull it up over your starting peg. Then grab the next loop to the left, pull it up over the adjacent peg. Do your best so each loop lines up with its appropriate peg until you’ve gone around the entirety of your loom.
From here, you should have no problem figuring out what to do, since you’ve already done it multiple times.

Insert your hook into the bottom loop.
Then pull that loop up and over the top of the peg. Repeat the process with each consecutive peg until you’ve gone around your entire loom.
Congratulations! You just finished the brim of your tiny hearts beanie.
A Free Pattern to Follow
Now that you’ve finished the brim, your tiny hearts beanie project will get a little more interesting and only slightly more complicated.
To make things easier, I put together a pixel pattern for you to follow. The numbers going horizontal to the left each represent a peg. On my loom, I have 36 pegs, hence the scale going to 36.
The numbers going vertically down the right represent the number of rows you’ll knit on your loom. The row number does not include the rows needed for the brim.
If your loom doesn’t match mine exactly, don’t panic. As you can see, I follow a very basic pattern. I knit two rows with my base color, and then on the third row, I include my alternate color. My alternate color skips two pegs. This is a pattern you can duplicate on just about any loom, though if you have a different number of pegs, the pattern might not line up as nicely.
Although they are square shaped in the pattern, each of these pixels will take on a heart shape as you knit. If you ever get lost during the next step, just take a quick peek at the pixel pattern and go from there.
Add Your Second Color
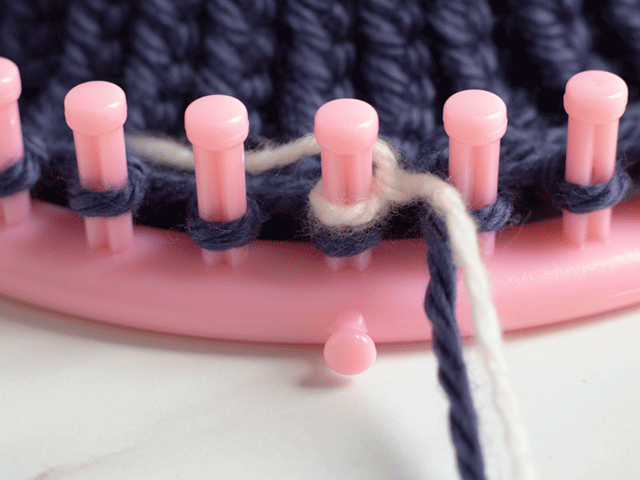
Before you add another color, double check that you’ve knitted two rows after completing your brim. The two-row buffer ensures your tiny hearts will stand out from the brim and won’t get lost in the bottom section of your hat.
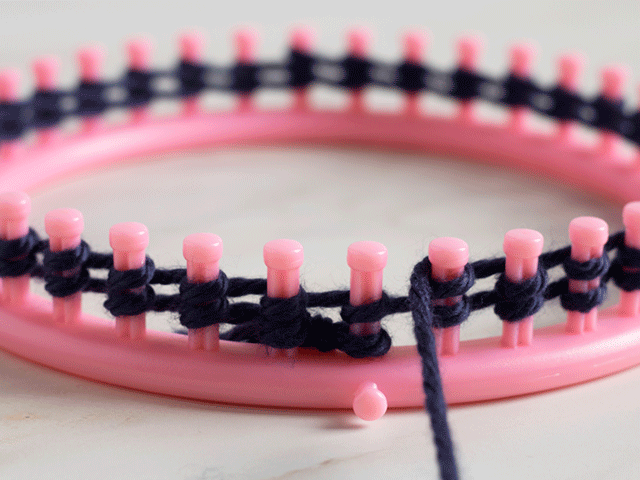
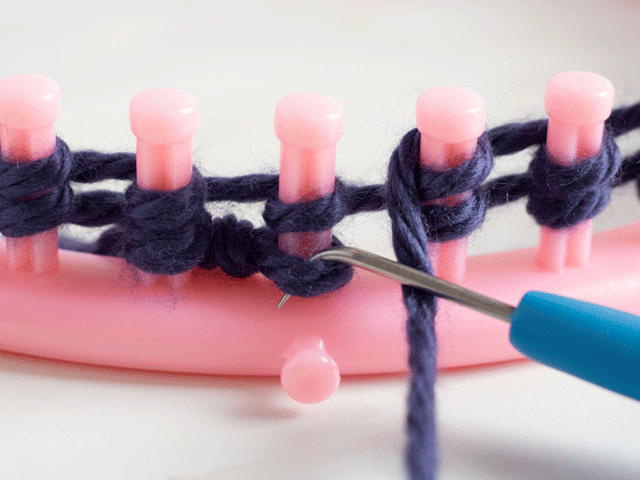
As with your first color, you’ll add your second color by tying a slip knot over your starting peg. This is where it gets a little tricky to juggle at first. Instead of e-wrapping each peg with one color, you’re going to e-wrap the next two pegs with your base color before you e-wrap with your second color.
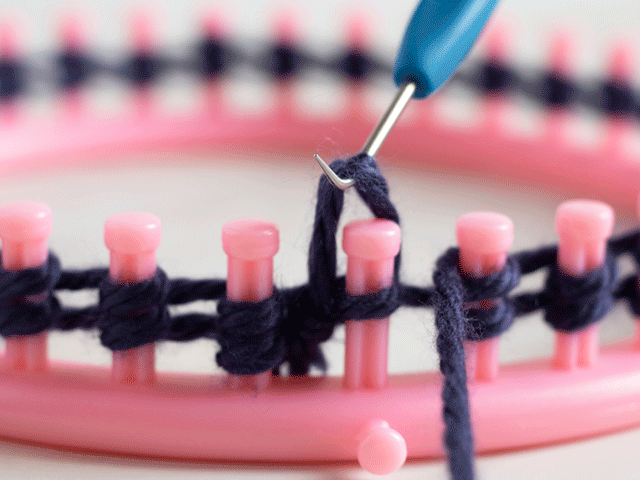
Each peg will still receive a a single e-wrap as you go around your loom. When you’ve finished wrapping, insert your knitting hook into the bottom loop, pull it up over the top of the peg, just like you did before.
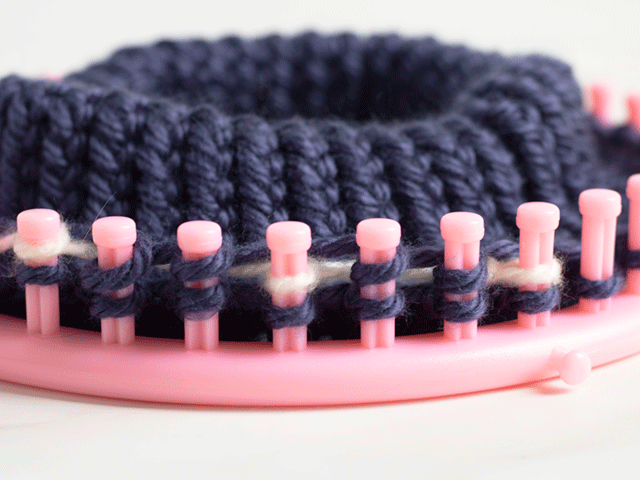
Keep Going
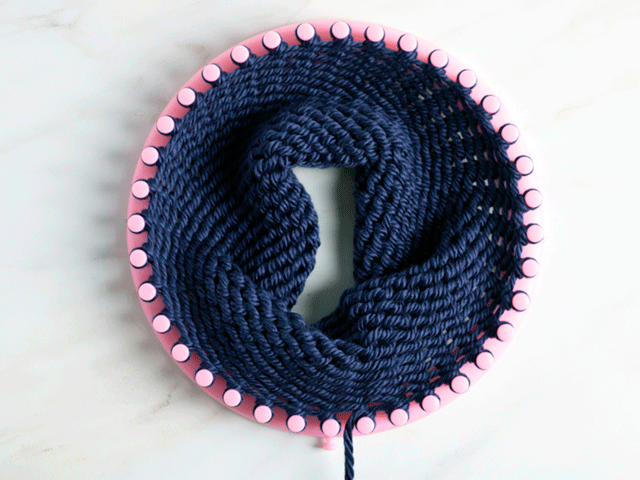
To make the rest of your hat, you just keep going. Keep e-wrapping two rows with your base color, then make a third row with your alternate color on every third peg. Eventually, your hat will start to look like this.

And soon it will start to look like this. Keep in mind that I pulled the hat up so you could see it better for the photo. This hat is inside out. If you leave your beanie to fall naturally inside the loom (rather than pulled up through the middle), it will be right side out.
You can choose just how long your want your beanie to be. I found 20 rows (not including the brim) was the sweet spot for my head size. However, you can go longer, especially if you prefer more of a slouchy look to your hats. If you have a smaller head, you could try 16 to 18 rows and see if that fits you.
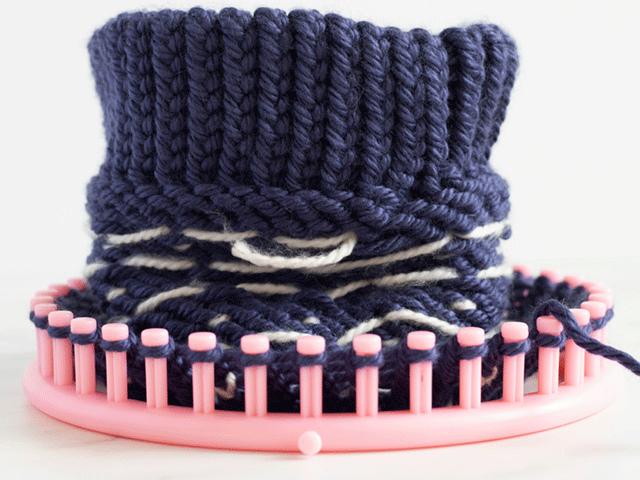
Going Off Loom
When you’re tiny hearts beanie is the length you want, then it’s time to take it off the loom. But don’t go pulling the loops off willy nilly, or you’ll have a mess on your hands.
Instead, wrap your working yarn around your loom one and a half times and then cut it. This length should give you plenty of room to tie off your hat.
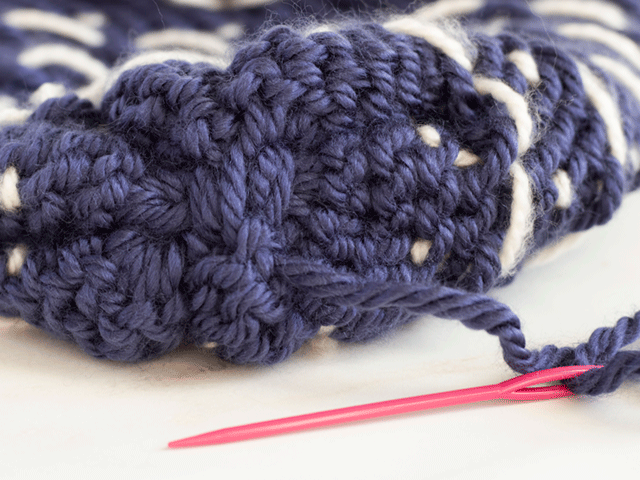
Next, grab a yarn needle and thread the end of your yarn through it. Insert the needle through the bottom of your starting stitch. (Note, I wasn’t paying attention when I took the picture. I was just trying to capture the gesture, but I later fixed my mistake and wove my needle through the correct loop).
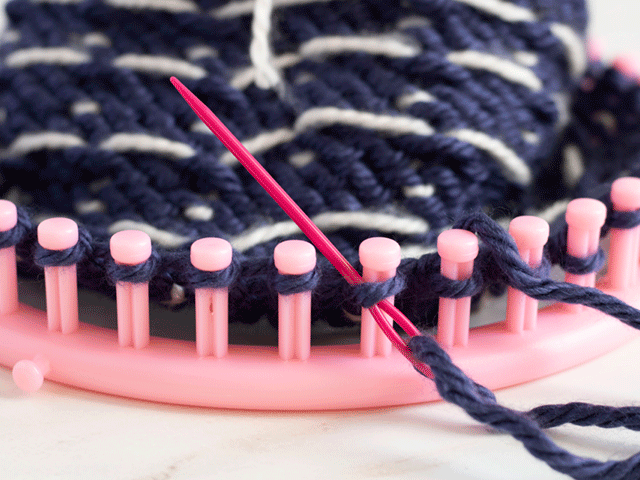
Pull the needle up through the loop and continue to pull until the loop slides up and off the peg. Repeat with the next loop, going through the bottom and pulling it off the top. Work your way around the entire loom until you’ve completely removed the hat from the loom.
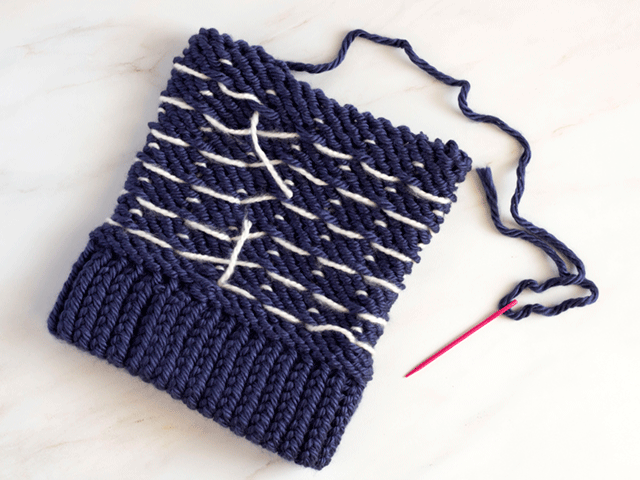
If you haven’t done this already, use this opportunity to tie off and trim your alternate yarn color. In the picture below, you’ll see I still have some long loose ends that I need to knot. If you still have a little excess yarn, you can weave it back into your hat to hide anything that looks loose.
Wrapping Things Up
When you’ve finished tying and trimming your alternate color, pull on your primary color yarn to cinch up the top of the hat. Yes, your beanie will have a large hole in the top, even if you pull the top fairly tight.
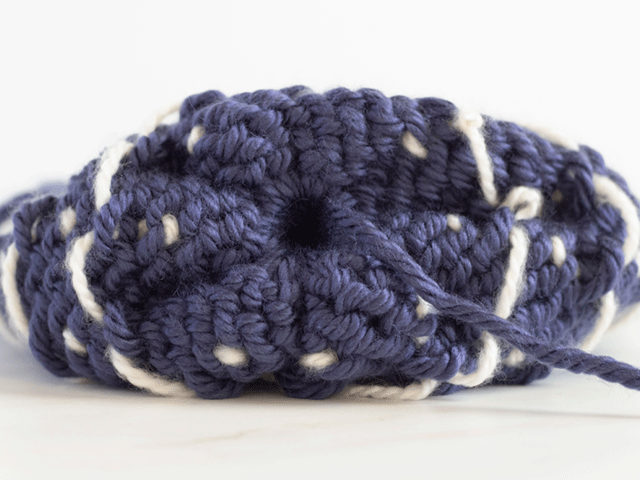
Use your remaining working yarn to stitch the top of the hat. I prefer to go back and forth and make a generic X shape with my stitching to better hold the hat together and cover the hole. Pull the yarn tight and tie a knot.
Weave some of the end yarn into your hat (to hide it), and then trim away the rest. Turn your hat right side out.
Congratulations! You’ve finished your tiny hearts beanie. Feel free to give it to someone as is to let them know how much you love them. Or you can wear it yourself and show the world your handiwork.
Want to Make a Pom-Pom?
I don’t know about you, but I feel that a lot of beanies are not complete without a fluffy pom-pom on top.
To start, grab both your main yarn and your alternate yarn and wrap them around one side or arm of the maker. The more you wrap, the fluffier your pom-pom will be.
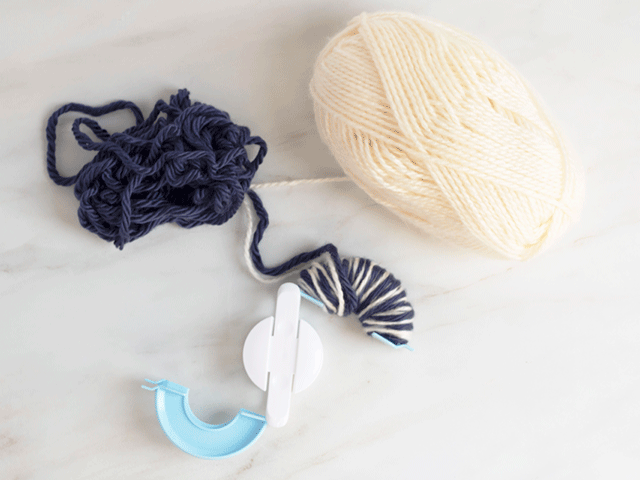
When you’ve wrapped as much as you can, cut the string and close the arm.
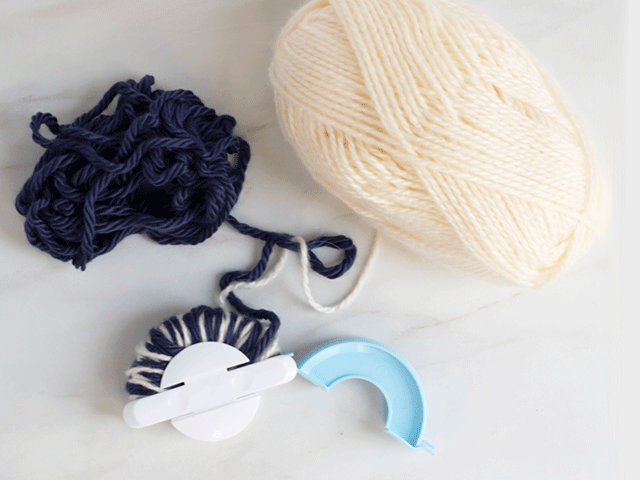
Repeat the same process with the other arm, wrapping both yarns around it. Cut the string and close the arm.
With a sharp pair of scissors or a razor blade, slice down the middle of the pom-pom maker along both sides.
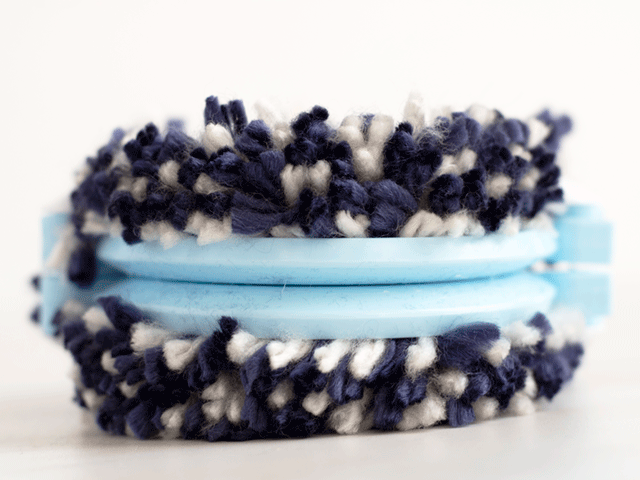
Grab some of your yarn and wrap it around the pom-pom maker. You want enough yarn to encircle the maker and still be able to tie a knot afterward. It’s okay to have a bit of extra yarn on either side, as you’ll use the excess to tie the pom-pom to your hat.
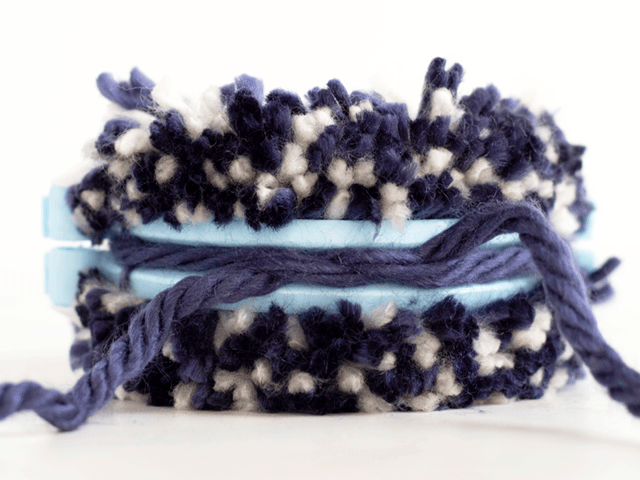
Tie your yarn around the pom-pom maker and pull it as tight as you possibly can.
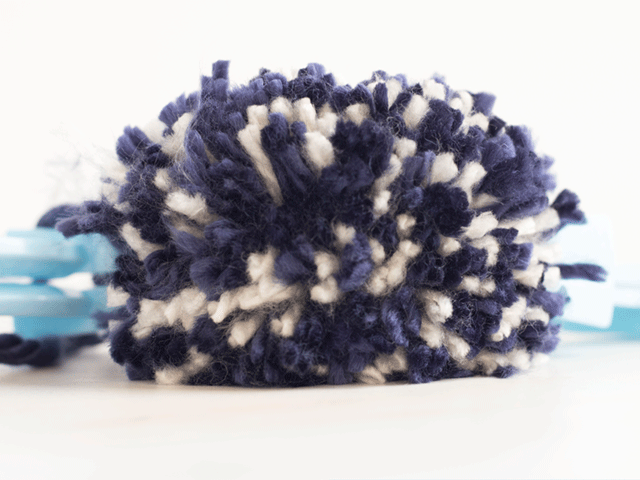
Open the arms of the pom-pom maker and pull the adjoining pieces apart to reveal your newly made pom-pom. From here, feel free to fluff up the yarn to cover your knot and trim any uneven bits of yarn. You can choose how much you trim, though I find if I trim a bit close, the pom-pom looks tighter and neater.
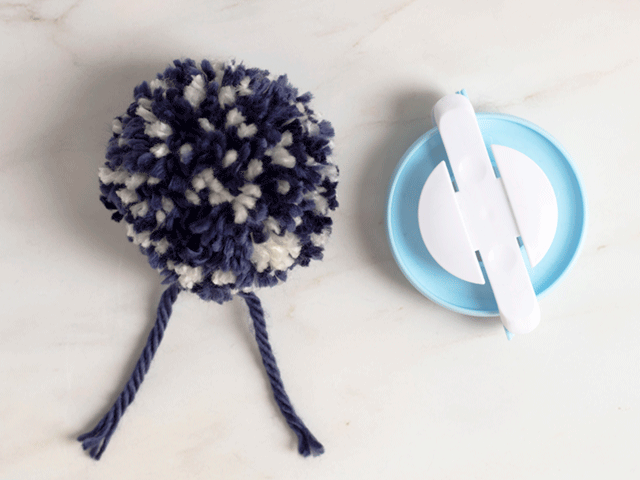
Now all you have to do is attach the pom-pom to your hat. I find that the easiest method to do this is to just pull the extra lengths of yarn through the top of the hat and then tie a knot on the inside. Trim any excess yarn, and your tiny hearts beanie will be good to go.
All Done! Did You Have Fun?
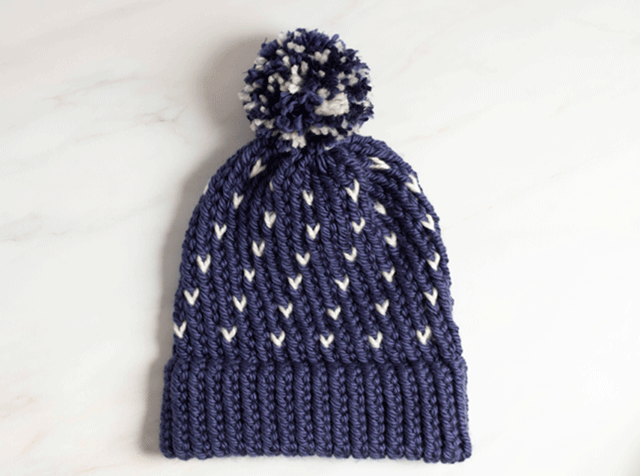
If you’ve followed my instructions from start to finish, this will be what your tiny hearts beanie will look like when it’s done (albeit, in colors of your choosing). I love how each of the stitches take on the shape of a little heart. And I can’t get enough of how fluffy that pom-pom is on the top.
I tried to make my instructions as clear and straightforward as possible. And I hope you had success with your hat.
But I understand that sometimes what seems simple to me might not be as understandable to others. If you struggled with my tutorial, please let me know in the comments below or shoot me a message through my contact me page. Your feedback can help me improve my instructions so everyone can have fun with this tiny hearts beanie.